Asus CM6730 User Manual
Browse online or download User Manual for PC/workstation barebones Asus CM6730. ASUS CM6730 User's Manual
- Page / 86
- Table of contents
- BOOKMARKS
- ASUS Desktop PC 1
- Second Edition 2
- December 2012 2
- Contents 3
- Notices 5
- VCCI Class B Statement 6
- KC: Korea Warning Statement 6
- RF Equipment Notices 7
- Safety information 8
- Where to nd more information 9
- Package contents 10
- Chapter 1 11
- Front panel 12
- 14 Chapter 1: Getting started 14
- Rear panel 15
- CM6330/CM6730 15
- Setting up your computer 20
- Connecting the power cord 25
- Turning your computer ON 26
- Chapter 2 27
- Using the Windows 28
- Hotspots 29
- 30 Chapter 2: Using Windows 30
- Working with Windows 31
- Accessing the All Apps screen 32
- Charms bar 33
- Inside the Charms bar 34
- Snap feature 35
- Other keyboard shortcuts 36
- Entering the BIOS Setup 38
- Chapter 3 39
- USB3.0 ports 40
- Connecting Headphone and Mic 41
- Connecting 2-channel Speakers 42
- Connecting 4-channel Speakers 43
- Connecting 6-channel Speakers 43
- Connecting 8-channel Speakers 44
- Setting up multiple displays 45
- From the Start screen 47
- From the Desktop mode screen 47
- Connecting an HDTV 48
- Chapter 4 51
- Using the memory card reader 52
- To use the memory card: 53
- Using the optical drive 54
- Inserting an optical disc 55
- Removing an optical disc 55
- ASUS PK1100 keyboard 56
- Chapter 5 57
- RJ-45 cable 58
- Wireless AP 64
- Charms Bar 65
- Chapter 6 67
- The Tool menu 68
- The Monitor menu 71
- The Update menu 71
- The System Information screen 73
- The Support screen 73
- The Settings screen 73
- Recovering your system 76
- Chapter 7 79
- No display on the monitor 80
- From the Desktop Mode screen 81
- Problem Possible Cause Action 82
- ASUSTeK COMPUTER INC 86
Summary of Contents
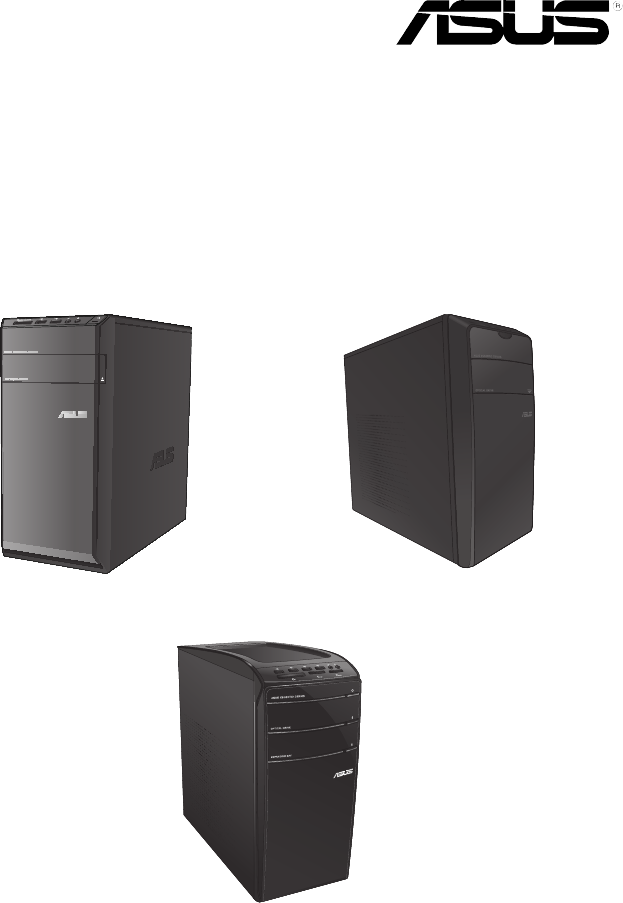
ASUS Desktop PCCM6330 CM6730 CM6830CM6730CM6330CM6830User Manual
10Package contents• If any of the above items is damaged or missing, contact your retailer.• The illustrated items above are for reference only. Ac
ASUS CM6330, CM6730, and CM6830 11Chapter 1Getting startedGetting to know your computerIllustrations are for reference only. The ports and their locat
12 Chapter 1: Getting startedENGLISHENGLISHENGLISHENGLISHFront panel17 235641. USB 2.0 ports.USB 2.0 ports. These Universal Serial Bus 2.0 (USB 2.
ENGLISHENGLISHASUS CM6330, CM6730, and CM6830 13ENGLISHENGLISH1523476CM67301. USB 2.0 ports.USB 2.0 ports. These Universal Serial Bus 2.0 (USB 2.0) p
14 Chapter 1: Getting startedENGLISHENGLISHENGLISHENGLISH14102356897CM68301. USB 2.0 ports.USB 2.0 ports. These Universal Serial Bus 2.0 (USB 2.0) po
ENGLISHENGLISHASUS CM6330, CM6730, and CM6830 15ENGLISHENGLISHRear panelDVIHDMI1345911862018719151412 161317102CM6330/CM67301. Voltage selector switc
16 Chapter 1: Getting startedENGLISHENGLISHENGLISHENGLISHActivity/Link LED Speed LEDStatus Description Status DescriptionOF
ENGLISHENGLISHASUS CM6330, CM6730, and CM6830 17ENGLISHENGLISH Audio 2, 4, 6, or 8-channel congurationPortHeadset 2-channel4-channel 6-channel 8-cha
18 Chapter 1: Getting startedENGLISHENGLISHENGLISHENGLISH2191835151617144131097 86113112CM6830• DO NOT connect a keyboard / mouse to any USB 3.0 port
ENGLISHENGLISHASUS CM6330, CM6730, and CM6830 19ENGLISHENGLISH Audio 2, 4, 6, or 8-channel congurationPortHeadset 2-channel4-channel 6-channel 8-cha
2Copyright © 2012 ASUSTeK Computer Inc. All Rights Reserved.No part of this manual, including the products and software described in it, may be reprod
20 Chapter 1: Getting startedENGLISHENGLISHENGLISHENGLISHSetting up your computerThis section guides you through connecting the main hardware devices,
ENGLISHENGLISHASUS CM6330, CM6730, and CM6830 21ENGLISHENGLISHCM6830
22 Chapter 1: Getting startedENGLISHENGLISHENGLISHENGLISHUsing the onboard display output portsConnect your monitor to the onboard display output port
ENGLISHENGLISHASUS CM6330, CM6730, and CM6830 23ENGLISHENGLISH• If your computer comes with an ASUS Graphics Card, the graphics card is set as the pr
24 Chapter 1: Getting startedENGLISHENGLISHENGLISHENGLISHConnecting a USB keyboard and a USB mouseConnect a USB keyboard and a USB mouse to the USB po
ENGLISHENGLISHASUS CM6330, CM6730, and CM6830 25ENGLISHENGLISHConnecting the power cordConnect one end of the power cord to the power connector on the
26 Chapter 1: Getting startedENGLISHENGLISHTurning your computer ONThis section describes how to turn on your computer after setting up your computer.
ENGLISHENGLISHASUS CM6330, CM6730, and CM6830 27Chapter 2Using Windows® 8Starting for the rst timeWhen you start your computer for the rst time, a s
28 Chapter 2: Using Windows® 8ENGLISHENGLISHENGLISHENGLISHUsing the Windows® UIThe Windows® User Interface (UI) is the tile-based display used in Wind
ENGLISHENGLISHASUS CM6330, CM6730, and CM6830 29ENGLISHENGLISHHotspotsOnscreen hotspots allow you to launch programs and access the settings of your D
3ContentsNotices ... 5Safety information ...
30 Chapter 2: Using Windows® 8ENGLISHENGLISHENGLISHENGLISHHotspot Actionupper left corner Hover your mouse pointer then click on the recent app’s thum
ENGLISHENGLISHASUS CM6330, CM6730, and CM6830 31ENGLISHENGLISHWorking with Windows® appsUse your Desktop PC’s keyboard or mouse to launch and customiz
32 Chapter 2: Using Windows® 8ENGLISHENGLISHENGLISHENGLISHAccessing the All Apps screenFrom the All Apps screen, you can congure an apps settings or
ENGLISHENGLISHASUS CM6330, CM6730, and CM6830 33ENGLISHENGLISHCharms barThe Charms bar is a toolbar that can be triggered on the right side of your sc
34 Chapter 2: Using Windows® 8ENGLISHENGLISHENGLISHENGLISHInside the Charms barSearch This tool allows you to look for les, applications, or programs
ENGLISHENGLISHASUS CM6330, CM6730, and CM6830 35ENGLISHENGLISHSnap featureThe Snap feature displays two apps side-by-side, allowing you to work or swi
36 Chapter 2: Using Windows® 8ENGLISHENGLISHENGLISHENGLISHOther keyboard shortcutsUsing your keyboard, you can also use the following shortcuts to hel
ENGLISHENGLISHASUS CM6330, CM6730, and CM6830 37ENGLISHENGLISH + <+>Launches the magnier and zooms in your screen. + <->Zooms out your sc
38 Chapter 2: Using Windows® 8ENGLISHENGLISHEntering the BIOS SetupBIOS (Basic Input and Output System) stores system hardware settings that are neede
ENGLISHENGLISHASUS CM6330, CM6730, and CM6830 39Chapter 3Connecting devices to your computer Connecting a USB storage deviceThis desktop PC provides U
4ContentsChapter 6: Using the utilitiesASUS AI Suite II ... 6
40 Chapter 3: Connecting devices to your computerENGLISHENGLISHENGLISHENGLISHDO NOT remove a USB storage device when data transfer is in progress. Doi
ENGLISHENGLISHASUS CM6330, CM6730, and CM6830 41ENGLISHENGLISHConnecting microphone and speakersThis desktop PC comes with microphone ports and speake
42 Chapter 3: Connecting devices to your computerENGLISHENGLISHENGLISHENGLISHConnecting 2-channel SpeakersCM6830
ENGLISHENGLISHASUS CM6330, CM6730, and CM6830 43ENGLISHENGLISHConnecting 4-channel SpeakersConnecting 6-channel Speakers
44 Chapter 3: Connecting devices to your computerENGLISHENGLISHENGLISHENGLISHConnecting 8-channel Speakers
ENGLISHENGLISHASUS CM6330, CM6730, and CM6830 45ENGLISHENGLISHConnecting multiple external displaysYour desktop PC may come with VGA, HDMI, or DVI por
46 Chapter 3: Connecting devices to your computerENGLISHENGLISHENGLISHENGLISHFor some graphic cards, only the monitor that is set to be the primary di
ENGLISHENGLISHASUS CM6330, CM6730, and CM6830 47ENGLISHENGLISH3. Turn on your computer. 4. Do any of the following to open the Screen Resolution set
48 Chapter 3: Connecting devices to your computerENGLISHENGLISHENGLISHENGLISHConnecting an HDTVConnect a High Denition TV (HDTV) to the HDMI port of
ENGLISHENGLISHASUS CM6330, CM6730, and CM6830 49ENGLISHENGLISHCM6830
5Notices ASUS Recycling/Takeback ServicesASUS recycling and takeback programs come from our commitment to the highest standards for protecting our env
50 Chapter 3: Connecting devices to your computerENGLISHENGLISH
ENGLISHENGLISHASUS CM6330, CM6730, and CM6830 51Chapter 4Using your computerProper posture when using your Desktop PCWhen using your Desktop PC, maint
52 Chapter 4: Using your computerENGLISHENGLISHENGLISHENGLISHUsing the memory card readerDigital cameras and other digital imaging devices use memory
ENGLISHENGLISHASUS CM6330, CM6730, and CM6830 53ENGLISHENGLISH3. When nished, right-click the memory card drive icon on the Computer screen, click E
54 Chapter 4: Using your computerENGLISHENGLISHENGLISHENGLISHUsing the optical drive123123CM6730CM6330
ENGLISHENGLISHASUS CM6330, CM6730, and CM6830 55ENGLISHENGLISHInserting an optical discTo insert an optical disc:1. While your system is on, press th
56 Chapter 4: Using your computerENGLISHENGLISHUsing the keyboard (on selected models only)The keyboard varies with models. The illustrations on this
ENGLISHENGLISHASUS CM6330, CM6730, and CM6830 57Chapter 5Connecting to the InternetConnecting via a DSL/cable modemTo connect via a DSL/cable modem:1.
58 Chapter 5: Connecting to the InternetENGLISHENGLISHENGLISHENGLISH3. Turn on the DSL/cable modem and your computer.4. Congure the necessary Inter
ENGLISHENGLISHASUS CM6330, CM6730, and CM6830 59ENGLISHENGLISHConnecting via a local area network (LAN)To connect via a LAN:1. Connect one end of an
6IC: Canadian Compliance StatementComplies with the Canadian ICES-003 Class B specications. This device complies with RSS 210 of Industry Canada. Thi
60 Chapter 5: Connecting to the InternetENGLISHENGLISHENGLISHENGLISHConguring a dynamic IP/PPPoE network connectionTo congure a dynamic IP/PPPoE or
ENGLISHENGLISHASUS CM6330, CM6730, and CM6830 61ENGLISHENGLISH6. Click Obtain an IP address automatically and click OK.Continue to the next steps if
62 Chapter 5: Connecting to the InternetENGLISHENGLISHENGLISHENGLISH9. Select Broadband (PPPoE) and click Next.10. Enter your User name and, Passwor
ENGLISHENGLISHASUS CM6330, CM6730, and CM6830 63ENGLISHENGLISHWireless connection (on selected models only)Connect your computer to the Internet throu
64 Chapter 5: Connecting to the InternetENGLISHENGLISHENGLISHENGLISH• To increase the range and sensitivity of the wireless radio signal, connect the
ENGLISHENGLISHASUS CM6330, CM6730, and CM6830 65ENGLISHENGLISHTo connect to a Wi-Fi network:1. Do any of the following to launch the Charms bar from
66 Chapter 5: Connecting to the InternetENGLISHENGLISH
ENGLISHENGLISHASUS CM6330, CM6730, and CM6830 67Chapter 6Using the utilitiesASUS AI Suite IIASUS AI Suite II is an all-in-one interface that integrate
68 Chapter 6: Using the utilitiesENGLISHENGLISHENGLISHENGLISHThe Tool menuThe Tool menu includes the EPU, Probe II, and Sensor Recorder panels.Launchi
ENGLISHENGLISHASUS CM6330, CM6730, and CM6830 69ENGLISHENGLISHLaunching and conguring Probe IIProbe II is a utility that monitors the computer’s vita
7RF Equipment NoticesCE: European Community Compliance StatementThe equipment complies with the RF Exposure Requirement 1999/519/EC, Council Recommend
70 Chapter 6: Using the utilitiesENGLISHENGLISHENGLISHENGLISHLaunching and conguring Sensor RecorderSensor Recorder allows you to monitor the changes
ENGLISHENGLISHASUS CM6330, CM6730, and CM6830 71ENGLISHENGLISHThe Monitor menuThe Monitor menu includes the Sensor and CPU Frequency panels.Launching
72 Chapter 6: Using the utilitiesENGLISHENGLISHENGLISHENGLISHUpdating the BIOS through a BIOS leTo update the BIOS through a BIOS le:1. From the AS
ENGLISHENGLISHASUS CM6330, CM6730, and CM6830 73ENGLISHENGLISHThe System Information screenThe System Information screen displays the information abou
74 Chapter 6: Using the utilitiesENGLISHENGLISHENGLISHENGLISHASUS Smart Cooling System (optional)ASUS Smart Cooling System is an optional feature on s
ENGLISHENGLISHASUS CM6330, CM6730, and CM6830 75ENGLISHENGLISHDuring the system reboot, the Power LED ashes to indicate that the dust extraction fan
76 Chapter 6: Using the utilitiesENGLISHENGLISHENGLISHENGLISHRecovering your systemResetting your PCThe Reset your PC option restores your PC to its f
ENGLISHENGLISHASUS CM6330, CM6730, and CM6830 77ENGLISHENGLISH5. Select the USB storage device where you want to copy the recovery les.6. Click Nex
78 Chapter 6: Using the utilitiesENGLISHENGLISHRemoving everything and reinstalling WindowsRestoring your PC to its original factory settings can be d
ENGLISHENGLISHASUS CM6330, CM6730, and CM6830 79Chapter 7TroubleshootingTroubleshootingThis chapter presents some problems you might encounter and the
8Safety informationDisconnect the AC power and peripherals before cleaning. Wipe the Desktop PC using a clean cellulose sponge or chamois cloth dampen
80 Chapter 7: TroubleshootingENGLISHENGLISHENGLISHENGLISH?No display on the monitor.• Check if the monitor is powered on. • Ensure that your monitor
ENGLISHENGLISHASUS CM6330, CM6730, and CM6830 81ENGLISHENGLISH?The picture on the HDTV is distorted. • It is caused by the different resolutions of y
82 Chapter 7: TroubleshootingENGLISHENGLISHENGLISHENGLISHPowerProblem Possible Cause ActionNo power (The power indicator is off)Incorrect power volta
ENGLISHENGLISHASUS CM6330, CM6730, and CM6830 83ENGLISHENGLISHLANProblem Possible Cause ActionCannot access the InternetThe LAN cable is not connected
84 Chapter 7: TroubleshootingENGLISHENGLISHENGLISHENGLISHSystemProblem Possible Cause ActionSystem speed is too slowToo many programs are running.Clos
ENGLISHENGLISHASUS CM6330, CM6730, and CM6830 85ENGLISHENGLISHCPUProblem Possible Cause ActionToo noisy right after turning on the computer.Your compu
ASUS contact informationASUSTeK COMPUTER INC.Address 15 Li-Te Road, Peitou, Taipei, Taiwan 11259Telephone +886-2-2894-3447Fax +886-2
9Conventions used in this guideTo ensure that you perform certain tasks properly, take note of the following symbols used throughout this manual. D
More documents for PC/workstation barebones Asus CM6730


Related products and manuals for PC/workstation barebones Asus CM6730
 (86 pages)
 (8 pages)
 (76 pages)
 (27 pages)
 (81 pages)
 (70 pages)
 (87 pages)

 (116 pages)
© 2020, manymanuals.com. All rights reserved. | 0.851 s |
 Manymanuals.com
 Manymanuals.de
 Manymanuals.fr
 Manymanuals.it
 Manymanuals.pl
 Manymanuals.cz
 Manymanuals.es
 Manymanuals-pt.com
Comments to this Manuals