Asus RT-AC56U User Manual
Browse online or download User Manual for Routers Asus RT-AC56U. ASUS RT-AC56U
- Page / 129
- Table of contents
- TROUBLESHOOTING
- BOOKMARKS
- RT-AC56U 1
- Table of contents 3
- 1.1 Welcome! 6
- 1.2 Package contents 6
- 1.3 Your wireless router 7
- 1.4 Positioning your router 9
- 1.5 Setup Requirements 10
- 1.6 Router Setup 11
- 2 Getting started 14
- for Automatic IP (DHCP) 16
- for PPPoE, PPTP, and L2TP 16
- for Static IP 17
- 3 Conguring the General 20
- 5GHz bands 21
- 3.2 Creating a Guest Network 26
- 3.3 Using the Trac Manager 28
- 3.3.2 Monitoring Trac 31
- 3.5.1 Using AiDisk 33
- 3.5.2 Using Servers Center 35
- IMPORTANT: 38
- 3.5.3 3G/4G 41
- 3.6 Using AiCloud 43
- 3.6.1 Cloud Disk 44
- 3.6.2 Smart Access 46
- 3.6.3 Smart Sync 47
- 4 Conguring the Advanced 48
- Settings 48
- 4.1.2 WPS 51
- 4.1.3 Bridge 53
- 4.1.4 Wireless MAC Filter 55
- 4.1.5 RADIUS Setting 56
- 4.1.6 Professional 57
- 4.2 LAN 59
- 4.2.2 DHCP Server 60
- 4.2.3 Route 62
- 4.2.4 IPTV 63
- 4.3 WAN 64
- 4.3.2 Port Trigger 67
- 4.3.4 DMZ 72
- 4.3.5 DDNS 73
- 4.3.6 NAT Passthrough 74
- 4.4 IPv6 75
- 4.5 VPN Server 76
- 4.6 Firewall 77
- 4.6.3 Keyword lter 78
- 4.6.4 Network Services Filter 79
- 4.7 Administration 81
- 4.7.2 System 82
- 4.7.3 Firmware Upgrade 83
- 4.8 System Log 84
- 5 Utilities 85
- 5.2 Firmware Restoration 86
- 5.3.1 ASUS EZ Printer Sharing 87
- 7. Follow the Windows 90
- TCP/IP Port. Click New Port 92
- 5.4 Download Master 96
- 5.4.2 NZB settings 98
- 6 Troubleshooting 99
- NOTES: 102
- Internet is not accessible 105
- Firmware upgrade failed 107
- Cannot access Web GUI 108
- Appendices 112
- CE Mark Warning 114
- Safety Information 114
- GNU General Public License 116
- For Turkey only 125
- ASUS Contact information 126
Summary of Contents
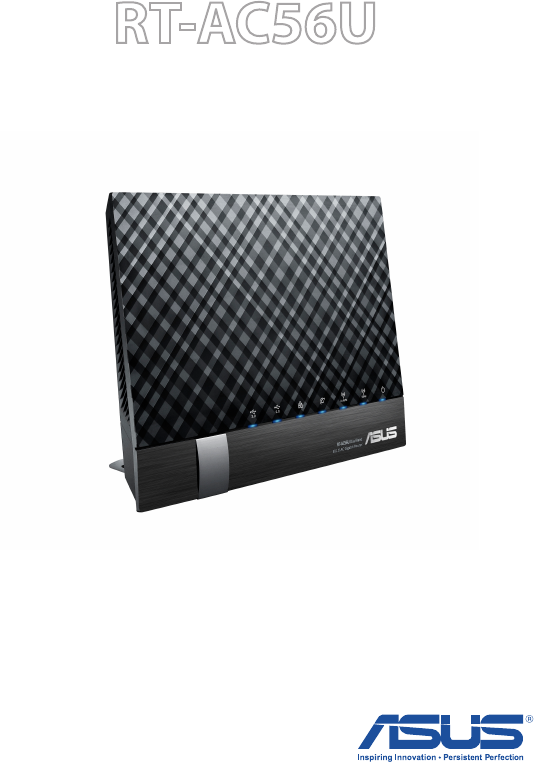
RT-AC56U Dual Band Wireless-AC1200 Gigabit Router User GuideThe ultra-thin and stylish RT-AC56U features a 2.4GHz and 5GHz dual bands for an unmatched
101.5 Setup RequirementsTo set up your wireless network, you need a computer that meets the following system requirements:• Ethernet RJ-45 (LAN) por
100Restart your network in the following sequence:1. Turn o the modem.2. Unplug the modem.3. Turn o the router and computers.4. Plug in the mode
101• Some cable modem service providers require you to use the MAC address of the computer initially registered on the account. You can view the MAC
1026.2 Frequently Asked Questions (FAQs) I cannot access the router GUI using a web browser• If your computer is wired, check the Ethernet cable con
103The client cannot establish a wireless connection with the router.NOTE: If you are having issues connecting to 5Ghz network, make sure that your wi
104• SSID has been hidden. If your device can nd SSIDs from other routers but cannot nd your router’s SSID, go to Advanced Settings > Wireless &
105Internet is not accessible.• Check if your router can connect to your ISP’s WAN IP address. To do this, launch the web GUI and go to General> N
106• If there is still no Internet access, try to reboot your computer and verify the network’s IP address and gateway address. • Check the status
107Firmware upgrade failed. Launch the rescue mode and run the Firmware Restoration utility. Refer to section 5.2 Firmware Restoration on how to use t
108Cannot access Web GUIA. Disable the proxy server, if enabled.Windows® 71. Click Start > Internet Explorer to launch the browser.2. Click Too
109MAC OS1. From your Safari browser, click Safari > Preferences > Advanced > Change Settings...2. From the Network screen, deselect FTP
111.6 Router SetupIMPORTANT!• Use a wired connection when setting up your wireless router to avoid possible setup problems.• Before setting up your
1103. To obtain the IPv4 IP settings automatically, tick Obtain an IP address automatically. To obtain the IPv6 IP settings automatically, tick Obt
111C. Disable the dial-up connection, if enabled.Windows® 71. Click Start > Internet Explorer to launch the browser.2. Click Tools > Interne
112AppendicesNoticesASUS Recycling/Takeback ServicesASUS recycling and takeback programs come from our commitment to the highest standards for protect
113Prohibition of Co-locationThis device and its antenna(s) must not be co-located or operating in conjunction with any other antenna or transmitterCA
114Safety InformationTo maintain compliance with FCC’s RF exposure guidelines, this equipment should be installed and operated with minimum distance 2
115Canada, Industry Canada (IC) NoticesThis Class B digital apparatus complies with Canadian ICES-003 and RSS-210.Operation is subject to the followin
116canadiennes ICES-003 et RSS-210.Son fonctionnement est soumis aux deux conditions suivantes: (1) cet appareil ne doit pas causer d’interférence et
117Everyone is permitted to copy and distribute verbatim copies of this license document, but changing it is not allowed.PreambleThe licenses for most
118We protect your rights with two steps: (1) copyright the software, and (2) oer you this license which gives you legal permission to copy, distribu
119of running the Program is not restricted, and the output from the Program is covered only if its contents constitute a work based on the Program (i
122. Using the bundled network cable, connect your computer to your wireless router’s LAN port.IMPORTANT! Ensure that the LAN LED is blinking.3 Usi
120 the program under these conditions, and telling the user how to view a copy of this License. (Exception: if the Program itself is interactive but
121cost of physically performing source distribution, a complete machine-readable copy of the corresponding source code, to be distributed under the t
122 Therefore, by modifying or distributing the Program (or any work based on the Program), you indicate your acceptance of this License to do so, an
123on consistent application of that system; it is up to the author/donor to decide if he or she is willing to distribute software through any other s
124NO WARRANTY11 BECAUSE THE PROGRAM IS LICENSED FREE OF CHARGE, THERE IS NO WARRANTY FOR THE PROGRAM, TO THE EXTENT PERMITTED BY APPLICABLE LAW. EXCE
125For Turkey onlyAuthorised distributors in Turkey:Penta Teknoloji Urunleri Dagitim Ticaret Anonim SirketiTel. No.: 0216 645 8200Address: DUDULLU OR
126ASUS Contact informationASUSTeK COMPUTER INC. (Asia Pacific)Address 15 Li-Te Road, Peitou, Taipei, Taiwan 11259Website www.asus.com.twTechnical Su
127Networks Global Hotline InformationRegion Country Hotline Number Service HoursEuropeCyprus 800-9249109:00-13:00 ; 14:00-18:00 Mon-FriFrance 0033-17
128Networks Global Hotline InformationRegion Country Hotline Numbers Service HoursAsia-PacicAustralia 1300-278788 09:00-18:00 Mon-FriNew Zealand 0800
129NOTE: For more information, visit the ASUS support site at: http://support.asus.comManufacturer:ASUSTeK Computer Inc.Tel: +886-2-2894-3447Address:
133. Insert your modem’s AC adapter to the DC-IN port and plug it to a power outlet.4. Install an IEEE 802.11a/b/g/n/ac WLAN adapter on your compute
142 Getting started2.1 Logging into the Web GUIYour ASUS Wireless Router comes with an intuitive web graphical user interface (GUI) that allows you
152.2 Quick Internet Setup (QIS) with Auto-detectionThe Quick Internet Setup (QIS) function guides you in quickly setting up your Internet connection
162. The wireless router automatically detects if your ISP connection type is Dynamic IP, PPPoE, PPTP, L2TP, and Static IP. Key in the necessary info
17 for Static IPNOTES:• The auto-detection of your ISP connection type takes place when you congure the wireless router for the rst time or when y
184. Your Internet and wireless settings are displayed. Click Next to continue.5. Read the wireless network connection tutorial. When done, click Fi
192.3 Connecting to your wireless networkAfter setting up your wireless router via QIS, you can connect your computer or other smart devices to your
2Copyright © 2013 ASUSTeK Computer Inc. All Rights Reserved.No part of this manual, including the products and software described in it, may be reprod
203 Conguring the General settings3.1 Using the Network Map Network Map allows you to congure your network’s security settings, manage your networ
213.1.1 Setting up the wireless security settingsTo protect your wireless network from unauthorized access, you need to configure its security settings
224. From the Security Level dropdown list, select the encryption method for your wireless network.IMPORTANT! The IEEE 802.11n/ac standard prohibits
233.1.3 Monitoring your USB deviceThe ASUS Wireless Router provides two USB 2.0 ports for connecting USB devices or USB printer to allow you to share
24IMPORTANT! You rst need to create a share account and its permission /access rights to allow other network clients to access the USB device via an
25Safely removing the USB diskIMPORTANT: Incorrect removal of the USB disk may cause data corruption.To safely remove the USB disk:1. From the navig
263.2 Creating a Guest NetworkThe Guest Network provides temporary visitors with Internet connectivity via access to separate SSIDs or networks witho
274. To congure additional options, click Modify.5. Click Yes on the Enable Guest Network screen. 6. Assign a wireless name for your temporary net
283.3 Using the Trac Manager3.3.1 Managing QoS (Quality of Service) BandwidthQuality of Service (QoS) allows you to set the bandwidth priority and m
294. On the user-dened QoS rules page, there are four default online service types – web surf, HTTPS and le transfers. Select your preferred servic
3Table of contents1 Getting to know your wireless router1.1 Welcome! ...
305. On the User-dened Priority page, you can prioritize the network applications or devices into ve levels from the user-dened QoS rules’ dropdow
313.3.2 Monitoring Trac The trac monitor function allows you to access the bandwidth usage and speed of your Internet, wired, and wireless networks.
323.4 Setting up Parental ControlParental Control allows you to control the Internet access time. Users can set the time limit for a client’s network
333.5 Using the USB ApplicationThe USB Applications function provides AiDisk, Servers Center, Network Printer Server and Download Master submenus.IMP
344. Create your domain name via the ASUS DDNS services, read the Terms of Service and then select I will use the service and accept the Terms of ser
353.5.2 Using Servers CenterServers Center allows you to share the media les from the USB disk via a Media Server directory, Samba share service, or
36To launch the Media Server setting page, go to General > USB application > Servers Center > Media Servers tab. Refer to the following for t
37 To delete an existing account:a) Select the account that you want to delete.b) Click .c) When prompted, click Delete to conrm the account
383. From the list of folders, select the type of access permission that you want to assign for specic folders:• R/W: Select this option to assign
39To use FTP Share service:NOTES: Ensure that you have set up your FTP server through AiDisk. For more details, refer to the section 3.5.1 Using AiDi
4Table of contents3.6 Using AiCloud ... 443.6.1 Cloud Disk ...
402. Congure the following settings:• Maximum Login UserSet the maximum number of concurrent connections of the Network Neighborhood or FTP Server.
41• Work Group Assigns the name of the local RT-AC56U network as seen in Network Neighborhood. NOTE: For Device Name and Work Group, the standard inp
42To set up 3G/4G internet access:1. From the navigation panel, click General > USB application > 3G/4G.2. In the Enable USB Modem eld, selec
433.6 Using AiCloudAiCloud is a cloud service application that allows you to save, sync, share, and access your les.To use AiCloud:1. From Google P
443.6.1 Cloud DiskTo create a cloud disk:1. Insert a USB storage device into the wireless router.2. Turn on Cloud Disk.3. Go to https://www.asusne
454. You can now start accessing Cloud Disk les on devices connected to the network.NOTE: When accessing the devices that are connected to the net
463.6.2 Smart AccessThe Smart Access function allows you to easily access your home network via your router’s domain name.NOTES: • You can create a
473.6.3 Smart SyncTo use Smart Sync:1. Launch AiCloud, click Smart Sync > Go.2. Select ON to enable Smart Sync.3. Click Add new account. 4. Ent
484 Conguring the Advanced Settings4.1 Wireless4.1.1 GeneralThe General tab allows you to congure the basic wireless settings. To configure the ba
494. In the Hide SSID eld, select Yes to prevent wireless devices from detecting your SSID. When this function is enabled, you would need to enter t
5Table of contents4.6.4 Network Services Filter ...804.7 Administration ...
50• WPA/WPA2 Personal/WPA Auto-Personal: This option provides strong security. You can use either WPA (with TKIP) or WPA2 (with AES). If you select t
514.1.2 WPSWPS (Wi-Fi Protected Setup) is a wireless security standard that allows you to easily connect devices to a wireless network. You can congu
52Note: WPS supports authentication using Open System, WPA-Personal, and WPA2-Personal. WPS does not support a wireless network that uses a Shared Key
534.1.3 BridgeBridge or WDS (Wireless Distribution System) allows your ASUS wireless router to connect to another wireless access point exclusively, p
54• HYBRID: Enables the Wireless Bridge feature and allows other wireless devices/stations to connect to the router.NOTE: In Hybrid mode, wireless de
554.1.4 Wireless MAC FilterWireless MAC lter provides control over packets transmitted to a specied MAC (Media Access Control) address on your wirel
564.1.5 RADIUS SettingRADIUS (Remote Authentication Dial In User Service) Setting provides an extra layer of security when you choose WPA-Enterprise,
57In the Professional Settings screen, you can congure the following:• Frequency: Select the frequency band that the professional settings will be
58• Date to Enable Radio (weekend): You can specify which days of the weekend wireless networking is enabled.• Time of Day to Enable Radio: You ca
59• Wireless multicast forwarding: Select Enable to allow the wireless router to forward multicast trac to other wireless devices that support mult
61 Getting to know your wireless routerNOTES:• If any of the items are damaged or missing, contact ASUS for technical inquiries and support, Refer t
60To modify the LAN IP settings:1. From the navigation panel, go to Advanced Settings > LAN > LAN IP tab.2. Modify the IP address and Subnet M
613. In the Domain Name text box, enter a domain name for the wireless router.4. In the IP Pool Starting Address eld, key in the starting IP addres
624.2.3 RouteIf your network makes use of more than one wireless router, you can congure a routing table to share the same Internet service.NOTE: We
634.2.4 IPTVThe wireless router supports connection to IPTV services through an ISP or a LAN. The IPTV tab provides the conguration settings needed t
644.3 WAN4.3.1 Internet ConnectionThe Internet Connection screen allows you to congure the settings of various WAN connection types. To congure the
65Enable NAT: NAT (Network Address Translation) is a system where one public IP (WAN IP) is used to provide Internet access to network clients with a
66 MAC Address: MAC (Media Access Control) address is a unique identier for your networking device. Some ISPs monitor the MAC address of networking
674.3.2 Port TriggerPort range triggering opens a predetermined incoming port for a limited period of time whenever a client on the local area network
68Trigger Port: Specify a trigger port to open the incoming port. Protocol: Select the protocol, TCP, or UDP. Incoming Port: Specify an incoming por
694.3.3 Virtual Server/Port ForwardingPort forwarding is a method to direct network trac from the Internet to a specic port or a specic range of po
71.3 Your wireless routerUSB 3.0 / 2.0 LED Off: No power or no physical connection. On: Has physical connection to USB 3.0 / 2.0 devices. LAN LED
702. Congure the following settings below. When done, click Apply. Enable Port Forwarding: Choose Yes to enable Port Forwarding. Famous Server Lis
71 Local IP: Key in the client’s LAN IP address. NOTE: Use a static IP address for the local client to make port forwarding work properly. Refer to s
724.3.4 DMZVirtual DMZ exposes one client to the Internet, allowing this client to receive all inbound packets directed to your Local Area Network. In
734.3.5 DDNSSetting up DDNS (Dynamic DNS) allows you to access the router from outside your network through the provided ASUS DDNS Service or another
74 Enable wildcard: Enable wildcard if your DDNS service requires one.NOTES: DDNS service will not work under these conditions:• When the wireless
754.4 IPv6This wireless router supports IPv6 addressing, a system that supports more IP addresses. This standard is not yet widely available. Contact
764.5 VPN ServerVPN (Virtual Private Network) provides a secure communication to a remote computer or remote network using a public network such as t
774.6 FirewallThe wireless router can serve as a hardware rewall for your network. NOTE: The Firewall feature is enabled by default.4.6.1 GeneralTo
78To set up a URL lter:1. From the navigation panel, go to Advanced Settings > Firewall > URL Filter tab.2. On the Enable URL Filter eld, se
793. Enter a word or phrase and click the Add button.4. Click Apply.NOTES:• The Keyword Filter is based on a DNS query. If a network client has alr
8NOTES: • Use only the adapter that came with your package. Using other adapters may damage the device.• Specications: DC Power adapter DC Output:
80To set up a Network Service lter:1. From the navigation panel, go to Advanced Settings > Firewall > Network Service Filter tab.2. On the En
814.7 Administration4.7.1 Operation ModeThe Operation Mode page allows you to select the appropriate mode for your network.To set up the operating mo
824.7.2 SystemThe System page allows you to congure your wireless router settings.To set up the System settings:1. From the navigation panel, go to
834.7.3 Firmware UpgradeNOTE: Download the latest rmware from the ASUS website at http://www.asus.comTo upgrade the rmware:1. From the navig
844.8 System LogSystem Log contains your recorded network activities.NOTE: System log resets when the router is rebooted or powered o.To view your
855 UtilitiesNOTES: • Install the wireless router's utilities from the bundled support CD. • If Autorun is disabled, run setup.exe from the ro
865.2 Firmware RestorationFirmware Restoration is used on an ASUS Wireless Router that failed during its rmware upgrading process. It uploads the r
873. Set a static IP on your computer and use the following to set up your TCP/IP settings: IP address: 192.168.1.x Subnet mask: 255.255.255.04. F
88NOTE: The print server function is supported on Windows® XP, Windows® Vista, and Windows® 7.To set up the EZ Printer sharing mode:1. From the navi
894. Follow the onscreen instructions to set up your hardware, then click Next.5. Wait a few minutes for the initial setup to nish. Click Next.6.
91.4 Positioning your routerFor the best wireless signal transmission between the wireless router and the network devices connected to it, ensure tha
908. After the printer’s driver installation is complete, network clients can now use the printer.7. Follow the Windows® OS instructions to install
915.3.2 Using LPR to Share PrinterYou can share your printer with computers running on Windows® and MAC operating system using LPR/LPD (Line Printer R
923. Select Create a new port then set Type of Port to Standard TCP/IP Port. Click New Port.4. In the Hostname or IP address eld, key in the IP add
935. Select Custom then click Settings.6. Set Protocol to LPR. In the Queue Name eld, key in LPRServer then click OK to continue.
947. Click Next to nish setting up the standard TCP/IP port.8. Install the printer driver from the vendor-model list. If your printer is not in the
959. Click Next to accept the default name for the printer.10. Click Finish to complete the installation.
96 5.4 Download MasterDownload Master is a utility that helps you download les even while your laptops or other devices are switched o.NOTE: You ne
975. Use the navigation panel to congure the advanced settings.To congure BitTorrent download settings:1. From Download Master’s navigation panel,
985.4.2 NZB settingsYou can set up a USENET server to download NZB les. After entering USENET settings, Apply.
996 TroubleshootingThis chapter provides solutions for issues you may encounter with your router. If you encounter problems that are not mentioned in
Related products and manuals for Routers Asus RT-AC56U
 (68 pages)


 (182 pages)
 (70 pages)
(34 pages)
(69 pages)
(70 pages)
(34 pages)
(69 pages)
 (34 pages)
(35 pages)
(34 pages)
(35 pages)
 (107 pages)
(64 pages)
(107 pages)
(64 pages)
 (70 pages)
(35 pages)
(66 pages)
(70 pages)
(34 pages)
(32 pages)
(3 pages)
(70 pages)
(35 pages)
(66 pages)
(70 pages)
(34 pages)
(32 pages)
(3 pages)
© 2020, manymanuals.com. All rights reserved. | 0.740 s |
 Manymanuals.com
 Manymanuals.de
 Manymanuals.fr
 Manymanuals.it
 Manymanuals.pl
 Manymanuals.cz
 Manymanuals.es
 Manymanuals-pt.com
Comments to this Manuals